Capture Beautiful Images at Night
By Christian Hoiberg0
Capturing stunning images in the pitch black isn’t as easy as one might think. Even if you’ve learned to master the basics of night photography, there are several factors involved that we aren’t exposed to in standard daytime photography.
However, you don’t need to make big adjustments in your workflow to start capturing beautiful images during the night as well. The process of photography is still the same.
Don’t Forget the Foreground
Forgetting to include a foreground is a common mistake that many make when learning night photography. In fact, it’s not only beginners who do it.
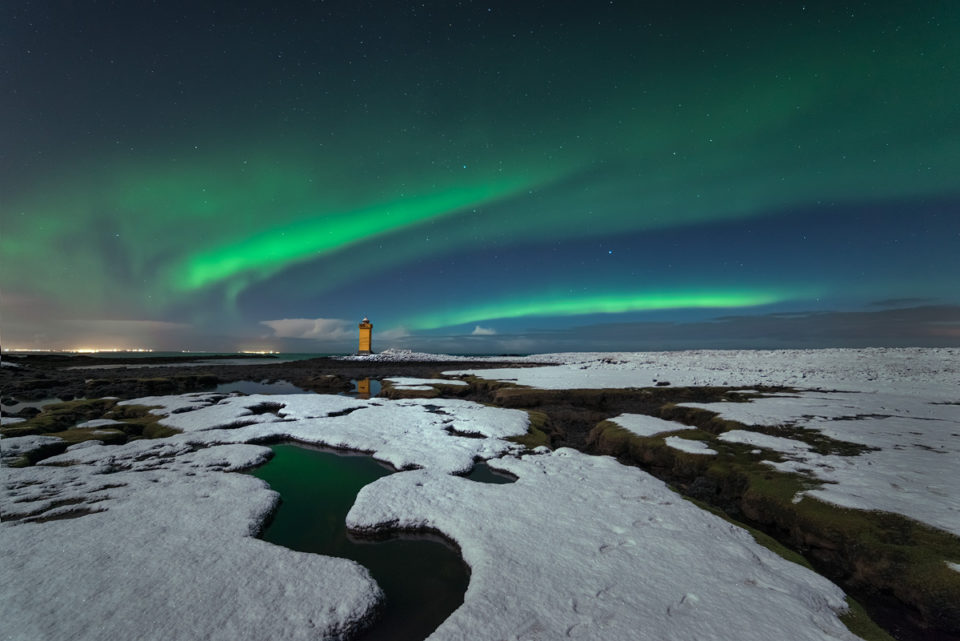
Having a strong composition is equally as important at night as it is in daylight. However, since the detailed Milky Way or powerful Northern Lights are eye-catching, you’re still able to get an impressive image without a strong composition. The difference is that even though the image appears impressive, it’s easy to see that there’s nothing special about it and it won’t be anything unique.
Images that combine the beautiful night sky with a strong composition are fewer and further between but those are also the images that you will remember. After all, a strong composition is one of the most important aspects of any image, regardless of genre.
Focus Manually
Despite the constant improvement in technology and modern DSLR cameras, autofocus still won’t do a good job at night, particularly if you’re photographing dark landscapes.
The camera isn’t able to see details the way we do and when you’re photographing in low-light, it struggles to gather enough information. Autofocus doesn’t work well since the camera isn’t able to find a reference point.

There are a few exceptions, however. If you’re photographing a brighter nightscape, such as a cityscape or architecture, there’s normally more available light than when photographing in pitch black landscapes. These give your camera several reference points to focus on and are more likely to give a better outcome. Still, I would recommend using the manual focus for a more accurate result.
Capturing sharp, in-focus images is one of the challenges with night photography. Live View is a great tool for focusing manually but it isn’t as easy at night as it is when there’s more light available. If you struggle with getting sharp images at night, I recommend reading our article How to Focus in Night Photography for a more in-depth explanation on how you can master this.
Know the moon’s phases
Knowing the phases of the moon and how it will impact an image is what separates the best night photographers from the rest. Photographing under a full moon is completely different than a during a new moon and despite this being something most of us know, it appears to be something we also easily forget.

A full moon not only makes the sky brighter, it also brightens the landscapes. What does this mean for you as a photographer? It means that you won’t be able to photograph as many stars as you would with a new moon but you’ll also get a beautifully lit landscape and won’t struggle as much with the darkest shadows. You’re also able to use a lower ISO, which results in less noise and a cleaner image.
None of the phases are more photogenic than the others. They all offer different opportunities but it’s important to be aware of these differences. By researching the moon’s phase, it will be easier to plan and visualize an image.
Avoid Light Pollution
OK. I’ll say this right away: sometimes light pollution can be beneficial for an image.
The orange or yellowish glow from the cities can often be damaging when photographing landscapes during the night. We often intend to capture the crisp night sky with its shining stars. The color cast created by the light pollution can often be distracting in this scenario and clouds get an artificial color that rarely looks good.
Also, when you’re photographing in or near a city with a lot of light pollution, you won’t see nearly as many stars. This is the biggest frustration with light pollution for night photographers.
That being said, there are some scenarios where the light pollution can benefit the image as well. A slight sign of light pollution in the horizon can enhance the mood of an image. Still, if you’re too close to a city, the color cast becomes too dominant and you won’t be able to benefit from it in the same way.

If you’re planning to photograph cityscapes at night, I recommend checking out NiSi’s Natural Night filter which removes light pollution from the image.
Manual White Balance
If you read our Beginner’s Guide to Night Photography, you might remember that manual is a word that you’ll hear often. Manual focus, manual settings and now manual White Balance.
Whether you’re photographing within a bright city or in a remote and dark area has an impact on the Automatic White Balance’s performance. In most cases, it will do a decent job and will neutralize most colors. However, it begins to struggle under certain conditions and the results you’re getting can be fascinating in themselves. Typical scenarios where the AWB doesn’t perform well are in areas with a lot of light pollution or with a big difference in colors. For example, the AWB rarely does a great job when photographing Northern Lights.
The ideal settings depend on the amount of light pollution, how dark it is and what you’re photographing. I tend to start by using 3400K and I’ll make adjustments from there. It’s better to have a slightly colder White Balance for night photography.
Not sure how you change the White Balance? Take a look at our article Master White Balance Like a Pro.
Longer Exposure or Higher ISO?
As a landscape photographer who’s used to using the lowest ISO possible, it’s quite challenging and almost painful to increase the ISO to 3200, 6400 or more. However, that’s something you’ll need to get used to when photographing at night. A higher ISO brings out more details and allows a shorter shutter speed but it also has a massive effect on the image quality. The higher the ISO, the more noise.

It’s important that you know how the shutter speed will impact a night photograph. Since the earth is rotating, there’s motion in the stars which becomes visible as we increase our exposure time. By using a long exposure, you’re able to capture this motion and you begin creating what’s known as star trails (an image where you can see the trails of the stars during a certain period of time). Sometimes this might be what you want but there are also other and better techniques to create beautiful star trail images.
So, how long can an exposure be before you see the star’s movement?
The answer isn’t quite as simple as one would hope; it can depend on whether you’re using a wide-angle or a Tele-zoom.
When using wide angle lenses, I rarely extend a shutter speed beyond 30 seconds if I intend to keep the stars sharp. There’s still going to be some movement but since the stars are so small in the frame it’s not noticeable. By extending the shutter speed to 45 seconds or longer, the motion becomes more visible and the stars will look slightly unfocused.
With a Tele-zoom, however, you need to use a much shorter exposure than this. At only 10 seconds, you’ll already begin to see the motion (keep in mind that this depends on how much you zoom in).
Lenses with Open Aperture
The last tip for better night photography is to use a lens with an open aperture. An open aperture allows more light to enter the camera in a shorter period of time, allowing more of the stars to be registered as well. The most popular lenses for night photography are those which have the possibility of using f/2.8 or wider.
Don’t worry, though. If you don’t have a lens that allows a wider aperture than f/4, you’ll still able to capture beautiful images at night. The biggest difference is that you’ll either need to increase the ISO or lengthen the exposure and you might not get a sky quite as detailed as you would with an f/2.8 or f/1.4.
What are your best tips for better night photography? Let us know in the comments below!
This northern light picture is so amazing. The shadow of lights is in the water and it is so wonderful scene. Thanks for sharing. I love to see northern lights and also like Alaska northern lights tours
ReplyDelete